Showing posts with label clothes. Show all posts

Friday, February 22, 2013

Heart & Soul: Infinity Scarf Two Ways Tutorial

I really liked the patchwork on this infinity cowl on the Art Gallery Fabrics blog. It's gorgeous on the model, but I wanted something a little more wearable for me. Something thinner, and a lot longer so I could get that pretty, layered look by looping it twice. In the end, I made two different versions, a simple scarf from large fabric pieces, and a more complex one to use up those last tiny bits from my favorite fabrics (I almost called this the quilter's variation). 


To make the simpler Heart scarf (named because of the Love fabrics I have had stashed for over a year now), you will need 7 fat quarters. Cut two 9.5 X 12 inch rectangles from each fabric. Using a 1/4 inch seam allowance, sew the rectangles into two rows along the 12 inch side (scroll down to see a diagram of suggested fabric placement). 

To make the Soul version, we're going to utilize scraps (mine are scraps from my Soul Blossoms basket quilt I have got to finish). 

Cut: 

8- 9.5 X 12 rectangles (block A)
4- 5 X 12 rectangles (block B)

4- 4 X 9.5 rectangles (block C)
2- 5 X 9.5 rectangles (block C)

2- 4 X 7 rectangles (block D)
2- 3 X 4 rectangles (block D)
2- 7 X 8.5 rectangles (block D)
2- 3 X 8.5 rectangles (block D)


Assemble two of block C by sewing two 4 X 9.5 and one 5 X 9.5 inch strips together along the 9.5 inch sides (the order doesn't matter). 

Assemble two of block D by sewing the 4 X 7 inch rectangle to the 3 X 4 rectangle along the 4 inch side. Sew the 3 X 8.5 inch rectangle to the 7 X 8.5 inch rectangle along the 8.5 inch side to create the second half of the four patch unit. Sew these two sections together so that the top seams intersect. 

Now you're ready to sew your rows. Each row will have 4 of block A, 2 of block B, one of block C and one of block D. Make 2.
Diagram for suggested fabric and block placement

Finishing instructions:

Place your two rows face down on top of each other (right sides together). Sew along both of the long sides with a 1/4 inch seam. Now, comes the weird part, but trust me, it works out in the end! Open up your scarf on one short end, reach inside, and grab the opposite end with your hand. Pull it up through the inside so that it's flush (1) with the end you started at. At this point, it should look like a windsock (2), not a scarf. Be careful not to twist it, or you will end up with a weird seam! 


Take the front off of your sewing machine and place your scarf around it (3). Sew almost completely around the outside edge, leaving about a six inch gap. Pull your scarf right side out through the gap and hand sew closed. That's it! 


You're now ready for the putting it on and looking instantly pulled together part, at least if you're not like me and in desperate need of a haircut. 


Let me know if you make one or both of these, I'd love to see them! I'm thinking I have to put more together for a few spring birthdays I know. 

Tuesday, November 13, 2012

Tie Dye Character Shirts

There has been no shortage of Scooby Doo in my house for the last month! My son Gabe and I both dressed up as characters from the show for Halloween, and this was after we had already started planning a little Scooby Doo birthday.


Mostly, Gabe's birthday consisted of some cake. We're going to put together little treat bags and possibly do a second cake over Thanksgiving with some extended family, but we couldn't let the actual day pass without some sort of celebration! 


I painted some characters on plain white shirts and picked up a tie dye kit on clearance to test out a theory I had (and to distract the kids a little). 


It turns out you can tie dye over top of fabric paint, but it is a lot of work! I'm wondering if the same effect could be gotten a lot easier by printing coloring pages onto iron-on paper. Maybe we'll try that theory next year! It would certainly be more doable for larger groups that way! 


Wednesday, October 17, 2012

Hunger Games Clove Halloween Costume for Girls


Source: google.com via Melinda on Pinterest


Has Hunger Games fever hit your house? It actually seems to be dying down here a little bit, but it was still first choice for Victoria's Halloween costume this year. Initially, she wanted to be Katniss, and I'm not sure what changed her mind, but by the time we went shopping she was all about Clove. I've spent a lot of time and dedicated a few Pinterest boards to this idea, so I thought I'd share what I've come up with and a couple ideas that may come in handy at your house, too! 

The basis of Clove's arena outfit are some basics that you may already have on hand, or that may not be unreasonable to buy if your daughter is the type who will wear these clothes regularly. 


Some cargo pants in any shade of brown or olive. Victoria is strictly a leggings and jeggings girl, so ours were purchased for $1.49 at the thrift store, but these are way cute and totally reasonable! 

A maroon, deep red, or burgundy tee. Victoria says this has to be a v neck, but I am finding that pretty darn impossible. They don't make many plain tees for girls, let alone plain tees in red. Purple, pink, neon green? Sure. Red, maroon or burgundy, not so much. The best thing I have found so far are the unisex tees on Hanes.com. They come in both maroon and deep red and short and long sleeved. 

A matching windbreaker. Yeah, this one is hard too, again, not something they really make for girls and the reason I listed so many colors for the tee. I really think maroon is the best match to the movie look, but I dare you to try to find a maroon windbreaker! The best I have found is this deep red at LL Bean. 


Source: llbean.com via Melinda on Pinterest


That jacket is $35, though, and like the cute little cargo pants, probably totally worth it if your child would get a lot of wear out of it, but mine is picky about her clothes. I personally think the jacket is optional, especially for Clove who has the awesome vest of knives! 

Last, but not least we have the boots! I pinned quite a few under $30 that I thought walked a nice line between Hunger Games movie feel and everyday wear-ability. My number one pic is this $19.99 pair from e-Bay.


Source: ebay.com via Melinda on Pinterest


But, when I showed the board to Victoria she picked a similar pair in a faux suede as the ones she would actually wear to school after Halloween. So, as cute as I think they are, I'll be leaving these ones on e-Bay for your kids! 

This pretty much covers the stuff you can buy, now, what to do about that wicked knife vest? Stay tuned to see our solution! 

Monday, July 30, 2012

Monday Moments, and vote for me!

How did it happen that it's Monday again? Wow! Kind of the same way I feel about Caroline being nine months old. She has officially been out just as long as she was in...


I posted this photo of her in the dress I made over on the Michael Miller Facebook page. If you "like" it, I have a chance to win 10 yards of fabric! So go visit and like the photos of people's projects, and if you have a project of your own made exclusively of Michael Miller Fabrics, enter along with me! 

In other news, I have been slacking at posting my Speed Scrap layouts here. I really enjoy the prompts as they force me to try things I wouldn't normally. 

Made with the adorable Brickworks kit.

Last Sunday I did this cute Lego page for Gabe. This Sunday I scrapped some more pictures from the photographer. 

Created with Siblings are Forever

Instead of paying for prints of all of these, then buying a photo album to put them into, I'm making a book. I'm going to try to put most of the 93 photos I got back into it. Some of them are definitely not frame worthy, but they do tell a story and are perfect for a scrapbook! 

Wednesday, April 11, 2012

The diaper

After three attempts at taking photos of the diaper I made in three different lighting situations and on three different colored backgrounds, I have determined that I'm not going to get perfect coloring on these. 


This is probably closest to the actual coloring, but the yellow is still too green and the blue/green color on the background (lining fabric) is not green enough. ::Grumble::


If you've been to JoAnn or The Hobby Lobby recently you have probably seen the Babyville products, even Fabric.com carries them now! My mother-in-law decided to see what the hype was about and bought a three pack of PUL each for me and her, and the cute matching fold over elastic and label packets for each of us too! 


I made the sham pocket flannel lined diaper from the Babyville book in a size small slim. I had all of these ideas on what I wanted to make first, combining what I thought were the best parts of each diaper pattern. I decided to follow my own advice though, and do the pattern as is the first time out, with the exception of the added gussets. That breastfed baby poop is scary stuff, I wanted the extra barrier. 


The "soaker" pattern was kind of a pain. It says that you can either serge, zig-zag or turn and top-stitch and since I don't have a serger I decided to go for the second most professional type finishing option. Yeah...the soakers (or what my husband called that maxi-pad type thing) are four layers of flannel and two layers of cotton batting. Hard to turn and top-stitch! And one of the patterns calls for two of these sewn together down the center! I may get brave enough to try it though. 

I have yet to actually use the diaper for more than a photo shoot, which she refrained from soiling it for. I'm curious to try though and see how this works out before I cut into the rest of my PUL. I figure even if this doesn't convert me to full fledged cloth diapering, at the very least I can use it at the beach this summer and save myself a ton of money on those cheap, do-nothing swim diapers. 

Monday, April 9, 2012

Two finishes!

I posted last Monday about entering the Challenge over at Amy's Creative Side. My goal was to finish the dress I started for Caroline, and I'm happy to say I did it! Want proof?


The dress is made from Simplicity 2668, and if you read my previous post about it, you can see what I meant about how huge it is! Though Caroline slightly exceeds the minimum height and weight for the 6 months size, I would not consider this fitting, at all. Which is a real bummer because not only is it adorable, she loves the bright, high-contrast colors. She does nothing but stare at and reach for this dress if it's in sight. I guess we'll try it on again in June, sigh

Big accomplishment for me, this was the first item I actually tried to machine sew a zipper in! (If you've been following for a long while, you might remember that I made a Halloween costume with a zipper a year ago. I was actually so nervous about messing it up that I hand stitched the whole thing in!) 


It's not perfect, especially that little gape in the middle there, but it opens and closes all the way, and I'll only get better from here!


And lastly, if you are visiting from Amy's blog you may have seen me comment that if I finished with time, I was going to try my hand at a cloth diaper. I had the time! I think it's so cute, but all of the pictures I took of the parts turned out funky, and I certainly can't show you the lining while the baby is wearing it..so I'll leave you with this adorable photo of chubby baby thighs and a promise that I will get some better pictures and post all about it in a couple days! 

Sunday, April 1, 2012

Great beginner patterns!

After I posted my progress pictures for Caroline's dress on my personal Facebook page, my friend Allison commented that she really thinks she could, and would like to make dresses for her little girl. I figured there are probably more people like her out there, so I went digging around for an inspiration post. 


These two patterns are adorable and super simple with no buttons or zippers. A great place to start! Simplicity 2377 is the cutest, I think, but only comes in sizes 3-8. However, 5695 has a really similar construction and comes in two size variants 1/2 (the equivalent of a 6-12 months) -2 or 2-4. I think it would look really close to the photo version in the older girls pattern if you changed out the middle tier of version A or B to a coordinating print..and hello, cute hats! 


And it wouldn't be an inspiration post without some crush-worthy fabric. First up, two prints from a collection I'm so in love with right now, Fly a Kite in Teal Circles and Red Damask. 


Another great collection, Children at Play these prints would make an adorable (but not over the top) whimsical dress! Pictured in Pink Pinwheels and Soft Pink Meadow.


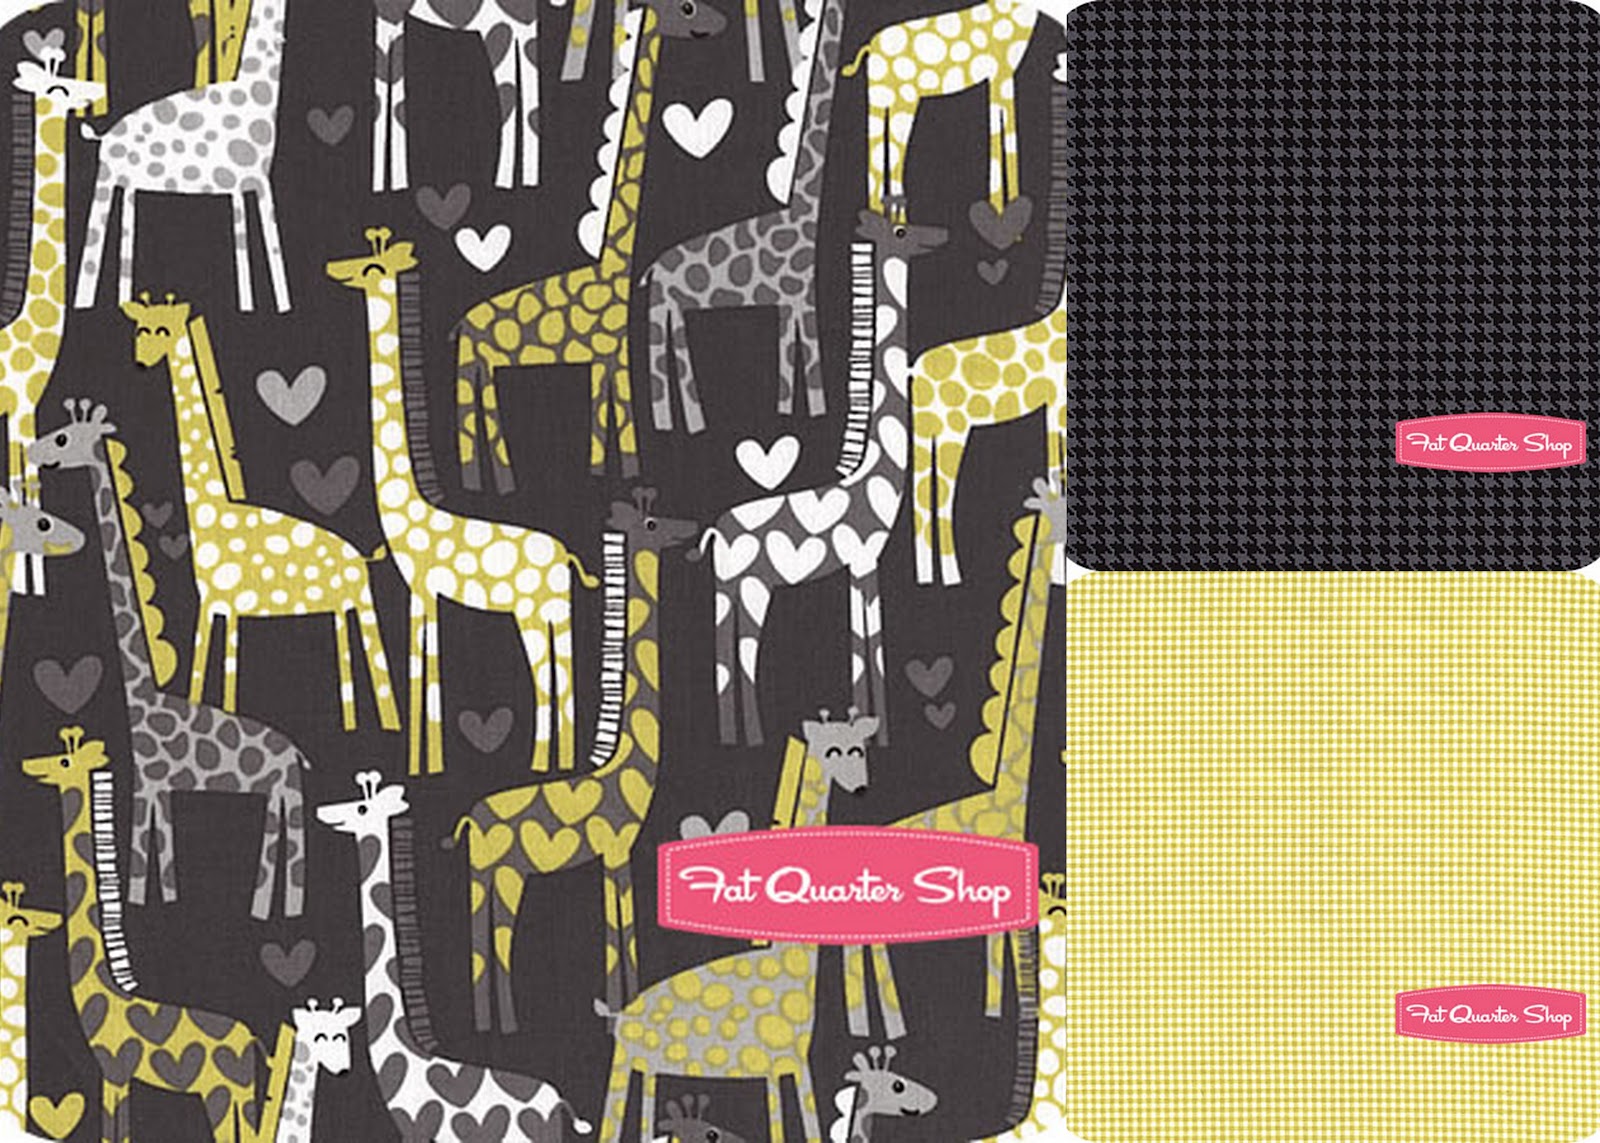
And for a similar feel to the dress I'm working on, in fabrics from the same manufacturer, Michael Miller, Citron Gray Giraffe Love and Tiny Gingham and Orchid Gray Charcoal Tiny Houndstooth

What do you think? There are, of course, a million cute kids clothing tutorials out there for free, but if you truly want to learn how to follow a manufactured pattern these would be great places to start! 


Friday, March 30, 2012

Well, darn!


As I previously mentioned, I had bought Simplicity 2668 to make for Caroline for her first birthday, and since it contained her current size, I was going to make one now to learn how it was going to fit her in seven months. 

It's coming along nicely. Unfortunately, it's also very large! 


She meets the minimum height and weight for the six months size, and she wears six months sizes off the rack in most brands, but this dress nearly goes to her ankles. It may be better when the pins are removed and I can actually put it on her. 


Before I can finish the collar (this is the facing pinned in to give you an idea) and sew in the zipper, I have to finish the arm holes. Which I am so torn about! They only call for a 3/8 inch seam, however, they already look gigantic! I'm seriously tempted to finish them off with bias trim so they don't get any bigger..the only thing that makes me hesitate is that the collar also has a 3/8 inch seam to be added in, which will bring them up further. 

I think I'm going to follow the pattern..maybe..you'll have to wait and see! 

Sunday, February 5, 2012

Vote for your favorite!

There is a little sewing competition going on in blogland hosted by Family Ever After. It's called Sew-vivor and it's really exciting and different. You enter by submitting any one thing you've sewn, from there, judges narrow the entries down to ten finalists who then create one new project per week for four weeks. The twist being that, just like Survivor, one or more finalist is voted out per week by the judges.

It sounds fun, right? And bonus for those of us with little sewing time on our hands, the last four weekly projects are listed on the blog right now so you can make them ahead and be all prepared if you progress to the finals!

The Family Ever After Blog suggests that you enter a project that showcases your talent, creativity and personality. I spent a lot of time on the blog looking over some of my past projects and narrowed it down to ten that I think are eye-catching while showing off at least some of the suggested criteria, but I can't decide which one is best to enter.


So, please do me a favor and tell me your favorite in the comments! And if your favorite wasn't one of mine, feel free to tell me that too!


Wednesday, February 1, 2012

Lots of pink and green

I'm not doing so well. I still have to finish the eight blocks I started two weekends ago, and I have been approached about another project that is pretty time sensitive (more about that when it is finished..I hope!). My time management isn't so bad, it's just that there is so little of it to manage.

So, when I mentioned to my husband that I might want to make Caroline a dress for her first birthday, he mentioned right back to me that I might want to start it when she's six months old. I think I gave him an obscene hand gesture, but I am starting to see his point.

I had the idea that it could be cute to take her banner from her baby shower (that is now hanging above her crib) and use it as a prop in her first birthday photos. Which means a pink and green dress to match. Here are my issues with that..pink and green are very spring colors, and Caroline was not a spring baby.

Mostly, I think this is fine. I think that her photos will be taken in a studio and no one will realize that she's wearing a spring dress in the fall, they'll just think it looks cute. Part of me wonders if that's a bit ridiculous though, putting her in an out of season dress just to match a banner I made for a late summer baby shower? I'm all for opinions on this.

Here is the dress pattern I like best so far.

I love this one, with the little 3/4 sleeve jacket. I see tons of potential and have already been auditioning prints for it.

Two color super mod combo. I'm not sure how I'd work that, since there isn't just a two print option in the pattern, but I have never been one to follow the patterns exactly.


And some more two color options. I really love this watercolor daisy print, but I think I would have to add at least some of the other color, these combos are cute, but a little boring to me.

And some three color options (which would obviously go with version A on the pattern).


I can't decide! I also can't decide which of these shoe patterns would go best with the dress pattern. Yes, shoe pattern. I am really thinking of making her shoes to go with this as well. I guess it's alright that I don't know yet since I have three more months before I have to get started, at least according to my husband.

Wow! Can you believe that a quarter of Caroline's first year has gone by already?! She's getting so big and developing so much personality!


Monday, October 25, 2010

Thank you very much


Finally finished with my nephew's costume on Sunday! One day before the One Thing, One Week Challenge deadline at Amy's Creative Side.

Amy's Creative Side


I altered this Simplicity pattern to a size 12 months and changed up the way it was done in a few spots to make it easier, and more wearable for a one year old. And I know they are choking hazards, but it just isn't an Elvis costume without all of the little iron on jewels and studs. He will be watched very carefully, I promise!

Friday, October 8, 2010

If you have been waiting for this...


It is officially on its way! I love this little baby doll ensemble.

Tuesday, August 3, 2010

Wardrobe

I have been hard at work drafting patterns for my niece's baby doll that came with nothing to wear other than a diaper. Here is what I have come up with so far.


The first pattern I was successful with was for this ensemble. I meant for the capri pants to be bloomers, but misread a measurement I made and decided this length was much more fitting for the style of the outfit. I initially intended for the shirt to be made from the dress fabric I used on my embroidered kokeshi doll, but I messed up my first draft and made the big mistake of making my first draft out of that fabric. Whoops! There wasn't enough left to make the kimono top out of, so I grabbed this coordinating, sort of Asian looking print from my stash.


Then I made the length a little longer (too long, if I make more pants I will definitely hem a half inch at the bottom versus a quarter) and turned the back of the kimono into the front of this shirt. For the back I just cut the front in half and added 3/4 inches to both sides. Much easier with a doll this tiny than trying to design anything to fit over her head. I appliqued a leftover piece of the teddy bear flannel to her shirt to make it look more like the pajamas my niece might wear.


Then there's this. My first draft of this top didn't work either. I had no gathers, but a really wide bottom thinking it would sort of puff out. It didn't. I'd like to try yet a third version of this where the top only goes about half way down the sleeves and the dress gathers from there, but I hate it when I draft a pattern that doesn't work, so I might just leave it. The bloomers are another altered version of the capri pants.

Other than making these same outfits in different color ways (and attempting to get a ruffle butt out of the backside of a different pair of bloomers) I really have no plans for more clothes. I might embellish with buttons, lace or rickrack, but I am thinking I'm done drafting patterns for her wardrobe. What do you think? Are these three styles enough?

Saturday, July 4, 2009

You know what this means?


It means I can start on the Pussycat purse. I'm so paranoid that I am going to mess something up that I won't allow myself to actually cut the pieces for the purses from the fabric until the dress is completely sewn. Clothes are hard, m'kay?


Well, harder than purses, anyway. I think I might like this one better than the birds. Maybe. Obviously since I picked out the fabric and, in the words of Spongebob's grandma, put love in every stitch, I'm kind of partial to them both.